
Guide to my first marine aquarium - Part one
A 90-litre cube, explained step by step for anyone starting from scratch
This article is dedicated to everyone taking their first steps into the wonderful world of the marine aquarium who has neither the time nor the inclination to read a couple of good books on the biology of tropical seas (although it would be good if they did). I believe, though, that it is also good reading for everyone who, badly advised by clumsy friends or inexperienced shopkeepers, finds themselves running badly set-up tanks that will never work properly.
The tank we have chosen, a cube 45 centimetres per side holding 90 litres, is indicative and is a sort of "compromise" between larger aquariums, easier to manage but much more expensive, and smaller ones, which, contrary to what people think, are more difficult, because in a little water every mistake is paid for at once.
With these premises out of the way, let's begin.
The filter? Forget it.
The first thing to know is that a modern marine aquarium housing mainly corals does not need a filter, either internal or external. So forget filter wool, ceramic rings and all the other media used in freshwater. The reason is simple: these media are no good in a mini-reef because, as they get dirty, they build up and then release into the water nitrates and other waste substances incompatible with the life of the corals we want to keep. Of course, if you only want to keep fish then nitrates do not matter that much and ceramic rings are fine, but that is a different aquarium.
But if there is no filter, internal or external, what purifies our aquarium? Answer: live rock. Or rather, the myriad of bacteria that, instead of living in a filter, swarm inside so-called live rock, which is nothing but fragments of rock from tropical reefs, imported and regularly sold in aquarium shops or websites. These rocks, full of tiny animals and various growths, arrive in our aquariums, where, as we said, they carry out their beneficial purifying action in place of the traditional filter.
A word about sand.
And sand? Is sand also a filter, as many people think? Answer: yes and no. In so-called DSB aquariums, that is Deep Sand Bed, a layer of sand about 10-12 centimetres deep is spread on the bottom of the tank, and like the rocks it fills with a myriad of beneficial microorganisms. In that case sand is useful and essential. It must be said, however, that, especially for a beginner, the DSB system is rather demanding and needs a certain kind of skill. So here we will deal with another kind of aquarium, the so-called "Berlin" type, which rather than DSB is BB: Bare Bottom, that is without sand.
At this point you might ask: is there no middle way? Is it not possible to add just a thin layer of sand, say three or four centimetres, at least for looks? Answer: no, it is not. While the deep DSB layer is beneficial, a little sand is just a trap for dirt that ruins the aquarium system.
So, for our Berlin cube, no sand. If you do not like a "bare" bottom, rest assured that many corals will lend themselves to elegantly covering the bare areas.
Lots, none, but not a little
- 1Deep Sand Bed useful, but demanding for a beginner
- 2Thin layer just a trap for dirt
- 3Bare Bottom bare bottom: the cube in this guide
For the author sand is useful only if it is deep: in the Berlin cube the bottom stays bare.
The water? "Home-made".
Let's move on to the water. Which water for our little marine cube? Forget what comes out of the tap: as it is, it is fine for us but not for the aquarium. So it has to be changed, purified.
Many shops sell this "pure" water ready-made, either fresh, to be mixed with the right salt, or already salted. But buying water from shops, going there with our little container, is a big mistake. Why? Because, even in good faith, shopkeepers have large purification units that are often not properly checked, so the water that comes out is not ideal. Believe me: the problems of an aquarium that is not doing well can often be traced back to this starting water.
So what? So you have to do it yourself. We must produce the water for our aquarium ourselves, by buying a small reverse osmosis unit: in practice, a little device that you attach to the tap and that, through a system of membranes and filter media, produces very pure water. Note: a reverse osmosis unit for aquarium use is bought in shops or online; for our little cube a small one is enough, and it costs less than 100 euros. But it is essential. Add to the shopping list a small TDS stick meter, which measures the amount of dissolved salts and so the purity of the water produced. The reading must be 0 TDS. That, and only that, is the water we will use for our aquarium.
Light and water movement.
Light in our little cubes is essential for life: just think, the vast majority of corals would not live without adequate light, for the simple reason that their tissues contain microalgae that need to photosynthesise. Which light to choose? I would go for an aquarium LED fixture of suitable power; for a 45 cm cube there are plenty, and the intensity will also depend on the animals we keep. Let's say that on ninety gross litres I use about a hundred watts of LED, but that is a rough guide: less power can also be enough.
As for water movement, the water in a marine tank must always be well stirred, especially at the surface, for the corals' well-being. For this so-called circulation pumps are used, many of which are designed specifically to make this movement as varied as possible, even creating a kind of wave motion. Let's say that two pumps will do for 90 gross litres; I use two Jebao pumps with flow variable between 500 and 4500 litres per hour and keep them almost at maximum, but it depends on the aquascape. What matters is that the surface is moving, almost choppy, and that there is some current at every point in the aquarium. I also use a smaller pump, 900 litres per hour, placed low behind the rockwork, but it is not compulsory.
Skimmer, auto top-off, heater.
Finally, there are three more pieces of equipment our cube must have: the skimmer, the auto top-off and the heater/thermostat. The first is a sort of filter that, through foam, extracts proteins and other pollutants from the water, making the rocks' "work" easier. The second is a system that automatically tops up the water that evaporates: this is essential because, since only fresh water evaporates, without topping up the salt concentration in the aquarium would keep rising and the system would collapse. As for the heater/thermostat, since the environment we are recreating is tropical, the temperature must obviously always be kept at about 23 to 25 degrees.
How the 45 cm Berlin cube is built
- 1LED fixture on 90 litres the author uses about 100 watts
- 2Two circulation pumps moving surface, current everywhere
- 3Live rock 12-15 kg: they purify instead of a filter
- 4Skimmer extracts proteins and other pollutants
- 5Heater set to 24 degrees
- 6Auto top-off tops up evaporated water
- 7Bare bottom no sand in the Berlin cube
90 gross litres: the live rock acts as the filter and the other equipment keeps the water stable.
With a sump or without?
But where do I put all this equipment? Here too some distinctions are needed. Most aquariums, especially those larger than ours, have a sump: a tank with compartments placed in the cabinet under the aquarium, which houses the skimmer, heater, auto top-off and other equipment. The aquarium water drains into the sump through an overflow, is treated and finally returned to the tank by the so-called return pump. The advantage is considerable: the total volume of water increases and you can leave the main tank free of any equipment.
Not everyone has the opportunity and the space for a cabinet with a sump, though: I, for example, do not have one at the moment, which is why in my cube the skimmer, the heater and the top-off sensor are in the tank, in one corner. So it depends a bit on space; what matters is knowing that a small aquarium, up to 100 litres, works just as well with or without a sump.
How water circulates between tank and sump
- 1Overflow water drains to the sump from here
- 2Sump compartmented tank in the cabinet
- 3Skimmer keeps the main tank clear
- 4Heater also housed in the sump
- 5Auto top-off the sensor checks the level
- 6Return pump sends treated water back to the tank
A sump gives more water and a clear tank, but up to 100 litres the cube works well without one too.
What you need and how to proceed.
Here are the "ingredients" you need to set up a marine aquarium (for example 45 by 45, 90 litres):
- Tank
- Heater/thermostat
- Thermometer
- 2 circulation pumps
- Return pump (if there is a sump)
- Auto top-off with reservoir
- Internal or sump skimmer
- LED light fixture
- Refractometer
- Sea salt
- A couple of plastic buckets
- Good-quality live rock, 12-15 kg
- Test kits for Ca, Mg and KH
- Test kits for nitrates and phosphates
Step by step
1. Position the tank and the equipment. Fill the tank about three quarters full with RO water. Add a good salt in the right proportion, about 36 grams per litre. In our 90-litre cube you will need to add about 3,240 grams of salt.
2. Switch on the circulation pumps and add more water up to about 3 cm from the rim of the tank. Plug in the thermostat/heater set to 24 degrees.
3. Leave the water and salt moving for a few hours, until the solution is clear. At this point, measure the specific gravity with the refractometer: it should be about 35 per thousand. If it is higher or lower, adjust by adding salt or fresh water.
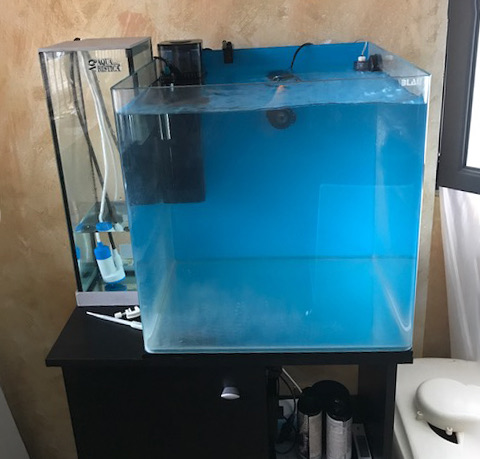
4. After a couple of days it is time to add the rocks. Try to create an airy, light rockwork with many nooks. Once you have found the right, stable arrangement, switch on the skimmer, the circulation pumps pointing slightly towards the surface, and the light fixture, straight away, with 10 hours of light a day: maturation will start from this moment. Now all you need is patience.
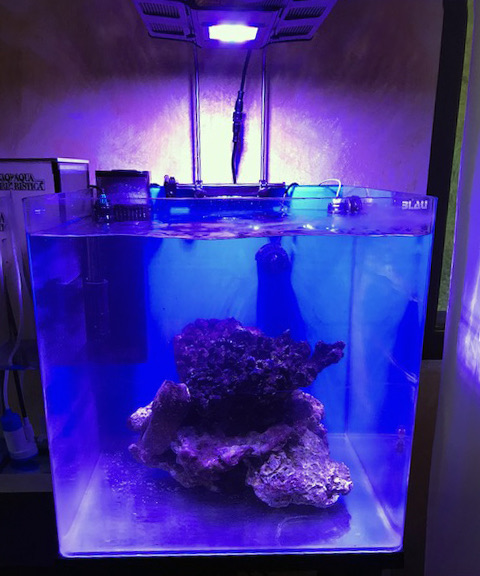
5. As the days go by, you will notice that the system starts to come alive. From the rocks, especially with the lights off, a myriad of organisms will appear: small crustaceans, little worms, tiny snails, small fanworms, sponges and so on. It is a very good sign. Also, after about fifteen days, the first algae will appear: first the brown ones, then the green ones. They are not pretty to look at but they are part of the maturation: let them grow, they will gradually go away on their own, usually within a month or two.
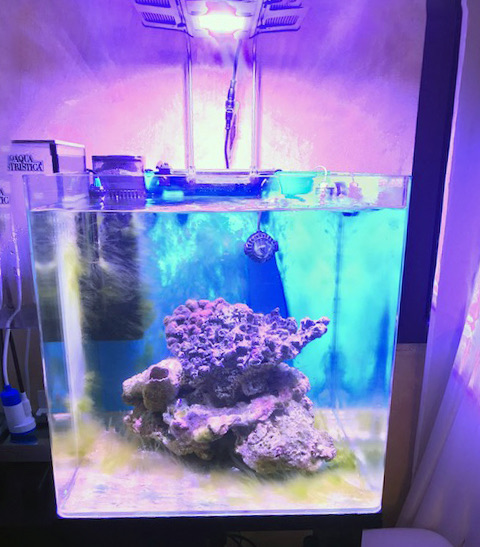
6. About a month after start-up (some do it earlier) it is time to do the first tests of the values. Without going into the chemistry, I will say here that the essential values to keep an eye on are those of the so-called Triad: calcium (Ca), magnesium (Mg) and carbonate hardness (KH). They are measured with the corresponding test kits available in the shops, which you absolutely must get. The right Triad values are roughly as follows: Ca 400-440, Mg 1260-1400, KH 7-8. Do not worry too much if at the first test the values are a bit off; there will be time to correct them. What matters is that there are no huge imbalances compared with the reference values I have given you.
7. Two other important tests to do about a month after start-up are those for pollutants, that is nitrates (NO3) and phosphates (PO4). The ideal nitrate level in a marine tank is about 1-2 mg/litre, while that of phosphates is 0.01-0.03 mg/litre. You may find higher values at this stage, but you will see that they tend to come down.
8. Once the tests are done and you have established that the values are normal and the algae are receding, let's wait another three or four weeks and then we can add the very first animals. For example two or three snails, also useful for grazing algae, perhaps a shrimp, a hermit crab. They are also excellent "guinea pigs" to check that everything is fine. From this moment you can also start doing a first water change, of about 25 per cent. Then you will go on doing a 10 per cent change every week; some do it every 15 days, it is subjective.
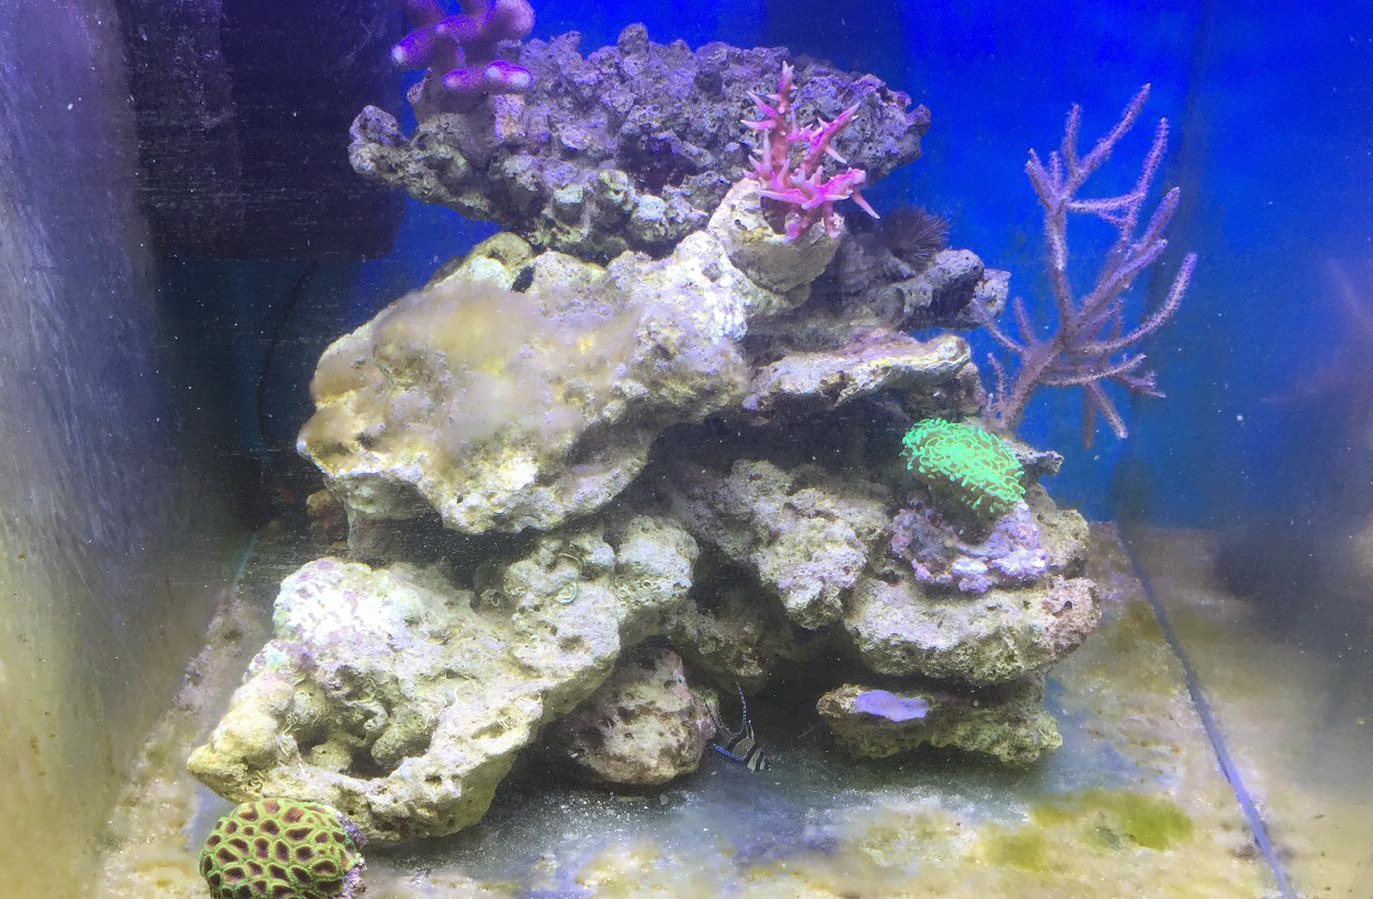
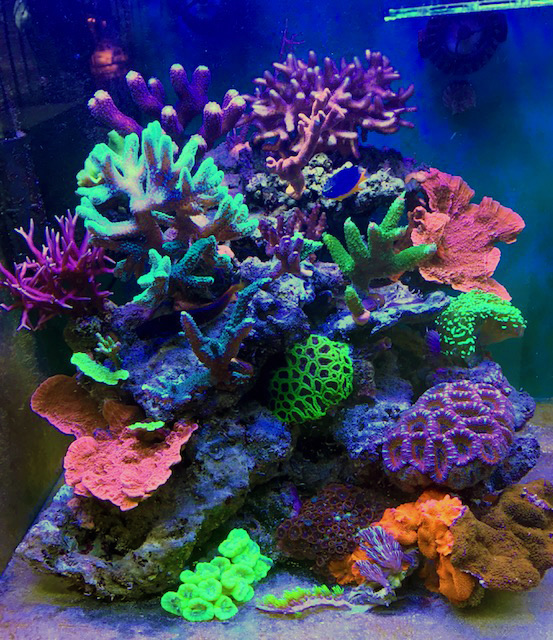
9. Let another fifteen days go by, do another round of tests.... If everything is fine, a couple of months after start-up your cube is ready for its first corals (some cut these times a lot, but trust me, in fishkeeping more than anywhere patience pays).
From an empty tank to the first corals
- 1Water and salt about 36 g per litre, then the pumps
- 2Rocks and light 10 hours a day: maturation starts here
- 3First algae part of maturation
- 4First tests Triad, nitrates and phosphates
- 5First animals snails, a shrimp, a hermit crab
- 6First corals if all the tests are fine
In fishkeeping more than anywhere patience pays: each stage waits for the previous one's tests.
Maintaining the aquarium.
It would be lovely if our marine aquarium, once mature, ran itself, but this, alas, is pure utopia. That does not mean you have to spend hours on it: with a few daily precautions and half an hour every weekend you should manage.
Checking the water and the values.
Let's start with checking the water. As we have already said, our corals thrive if certain values are kept under control, mainly the Triad (Ca, Mg and KH) and pollutants (NO3 and PO4). To keep the Triad stable (since corals constantly consume these elements) three main systems are used: topping up the elements by hand with the A+B liquids (for smaller aquariums), the Balling method with dosing pumps (for which I refer you to the excellent article on this site) and the calcium reactor.
Which system to use depends on many factors. For our first little aquarium I would say use the first, that is adding A+B: it is a bit of a nuisance because the additions are made by hand, but for a beginner it is an acceptable and more controllable solution. Otherwise I would go straight for Balling.
Be careful, though: supplements must not be added at random. You must test first, and from maturation onwards I recommend testing every week. Test calcium, magnesium and KH which, as I have said, should be more or less at the following values: calcium 400-440, magnesium 1250-1400, KH 7-8. These values, depending on how many corals there are, will tend to fall, which is why they will gradually need to be topped up with balanced solutions that do not favour one element over another but keep the ratio between the three elements balanced. It will be up to you, by testing, to work out how much supplement to add and how often.
The values to keep an eye on
| What | Value | When |
|---|---|---|
| Calcium (Ca) | 400-440 | Test every week |
| Magnesium (Mg) | 1260-1400 at step 6, 1250-1400 for maintenance | Test every week |
| KH | 7-8 | Test every week |
| Nitrates (NO3) | about 1-2 mg/litre | A month after start-up |
| Phosphates (PO4) | 0.01-0.03 mg/litre | A month after start-up |
| Specific gravity | about 35 per thousand | With every new batch of water |
| Temperature | about 23 to 25 degrees | Every day |
| RO water | 0 TDS | Every time you make it |
First the tests, then the supplements: additions must never be made at random.
The partial water change.
One of the essential tasks to carry out every week, or at most every fifteen days, is changing about 10 per cent of the water. All you need is a couple of very clean plastic buckets, preferably new and used only for our aquarium, the refractometer, a small kitchen scale, a small circulation pump, a small heater and the salt. Fill the bucket with RO water, pour in the right amount of salt (about 36 g per litre), put in the heater and the little pump, switch them on and wait a few hours for the water to be ready. Then measure the salinity with the refractometer and bring it to 35 per thousand if necessary with small corrections. Finally, remove the right amount from the aquarium with a tube and, very slowly, add the new water.
Day by day.
A quick daily check does no harm. Make sure everything is working, clean the glass with the magnets if necessary, take a look at the animals, check the temperature, remove any organic remains from the bottom. And, above all, enjoy the beauty of a small microcosm that is about to "blossom" and evolve.
That is all for now. In a future article we will talk about the first animals to add and their care and feeding. See you soon.
author: Metello Venè
Sources
- Yuen Y.S., Yamazaki S.S., Nakamura T., Tokuda G., Yamasaki H. (2009). Effects of live rock on the reef-building coral Acropora digitifera cultured with high levels of nitrogenous compounds. Aquacultural Engineering 41(1): 35-43.
- Li Y., Zheng X., Yang X., Ou D., Lin R., Liu X. (2017). Effects of live rock on removal of dissolved inorganic nitrogen in coral aquaria. Acta Oceanologica Sinica 36(12): 87-94.
- NOAA National Ocean Service (2026). Corals Tutorial: What is Zooxanthellae?. National Oceanic and Atmospheric Administration.
- NOAA National Ocean Service (2026). Corals Tutorial: Where are corals found?. National Oceanic and Atmospheric Administration.
On the same topic
My first marine aquarium guide - Part three
Which animals to avoid when starting out and how to recognise, group by group, a healthy coral or invertebrate before…
Guide to my first marine aquarium - Part two
The first inhabitants of the 90-litre cube: the snails, hermit crabs, shrimps and urchins that keep the tank clean,…
Chemistry and biomineralisation
KH, calcium and magnesium are not just numbers to keep stable: they are the bricks, the cement and the additive on…
Comments (9, in Italian)
SOLO ORA SONO RIUSCITO A LEGGERE I VOSTRIAPPROFONDIMENTI SUI VARI TEMI, SPIEGAZIONI SEMPLICI CHIARE ED ESAUSTIVE . GRAZIE MILLE
Splendido articolo , con parole semplici e chiare anche per un neofita.
Sarebbe possibile avere informazioni per un acquario marino tropicale di pesci e coralli ( solo molli e alcuni LPS ) da 340 lt ?
Vi ringrazio anticipatamente .
Saluti
Max
Ottima guida per un neofita: chiara , linguaggio semplice, esempi pratici.... Complimenti
Grazie mille!
Finalmente qualcuno che ci spiega passo a passo come fare . Un bel lavoro. Coplimenti!!
Bravissimi spiegazioni molto esaustive però vi prego ditemi la potenza della pompa di risalita a un acquario 45x45x45 totale 90 litri più 30 litri di samp grazie anticipatamente
Ciao,
per avere più spiegazioni postate la vostra richiesta sul gruppo Facebook.
Grazie
Simply wanna tell that this is extremely helpful, Thanks for taking your time to write this.
Magnificent goods from you, man. I've understand your stuff previous to and you're just extremely fantastic.
I actually like what you have acquired here, certainly
like what you're saying and the way in which you say it.
You make it enjoyable and you still care for to keep
it smart. I can not wait to read much more from you.
This is actually a wonderful website.